r-pac Web Order Tracking System
JCPenney
User Manual
Latest update date: Apr 10, 2013
The information in this document is subject to change without notice and should not be construed as a warranty or commitment by r-pac International or any other party. r-pac International, its affiliates, its owners and operators, assumes no responsibility for any errors that may appear in this document. Users of the systems and programs described herein are responsible for determining the suitability of those systems and programs for their specific uses.
No responsibility is assumed for the unauthorized use of any information contained herein.
1. Login
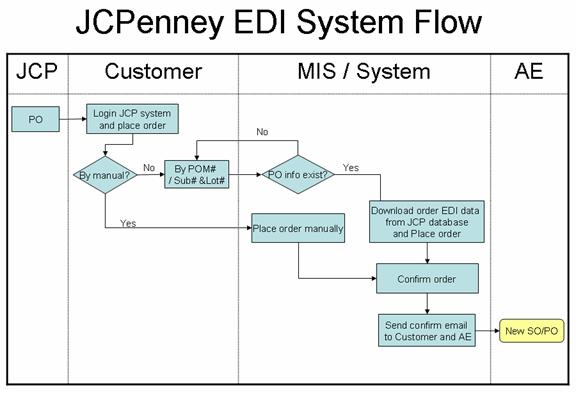
A.Website: http://jcp.r-pac.com
B. Sign Up:
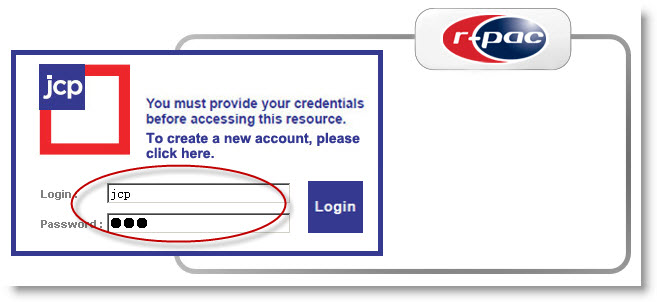
Input the user ID and Password, and click the ‘Login’ button into the JCPenney order tracking system.
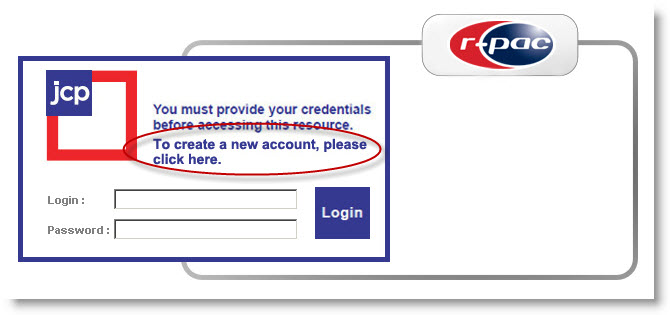
User could click on the login interface to create a new user account, you can refer (Create an account).
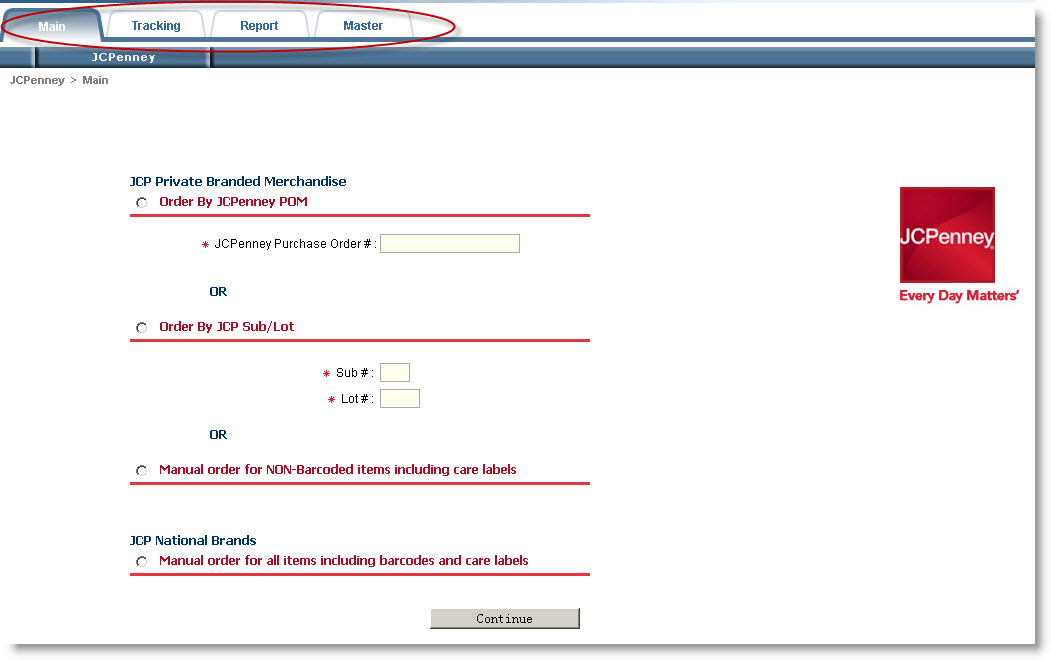
Main: Place order screen.
Tracking: Search the confirmed orders.
Report: Report module use to export order report.
Master: View item information.
2. Place Order
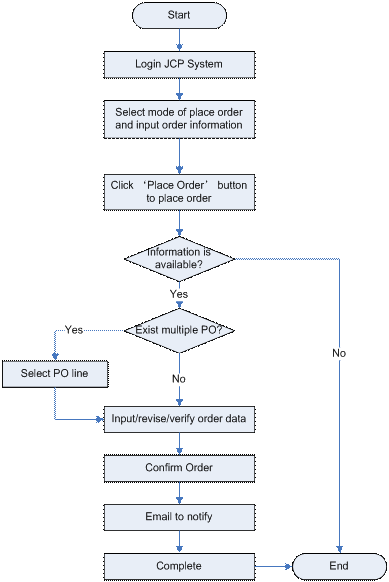
Place order flow:
2.1 Order By JCPenney POM Number
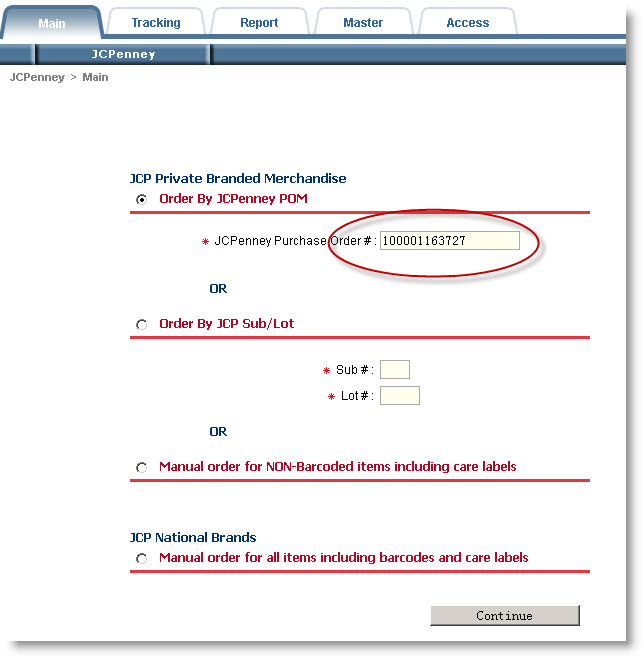
1) Select mode of place order ‘Order By JCPenney POM’ and input the ‘Vendor PO#’, and then click on the ‘Continue’ button to show the screen pull from JCP with quantities included (But should be editable) when PO exist, and if there are more than one PO was found, user can select the PO from the search result list.
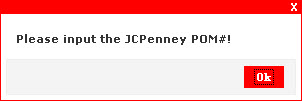
If you didn’t input the ‘Vendor PO#’, system will pop-up a warning message to remind you to input if after you clicking the ‘Continue’ button.
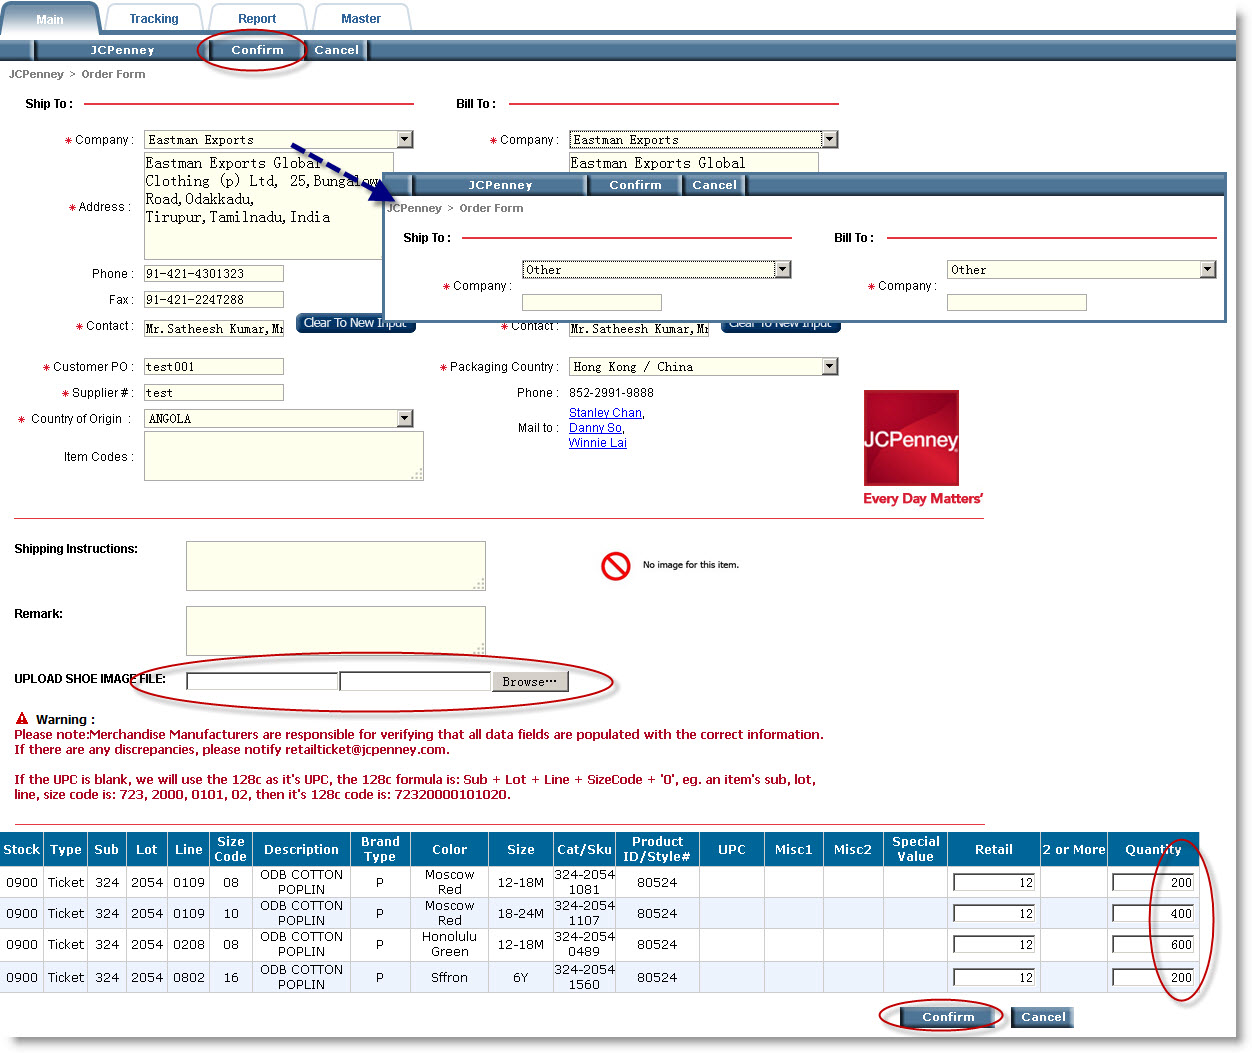
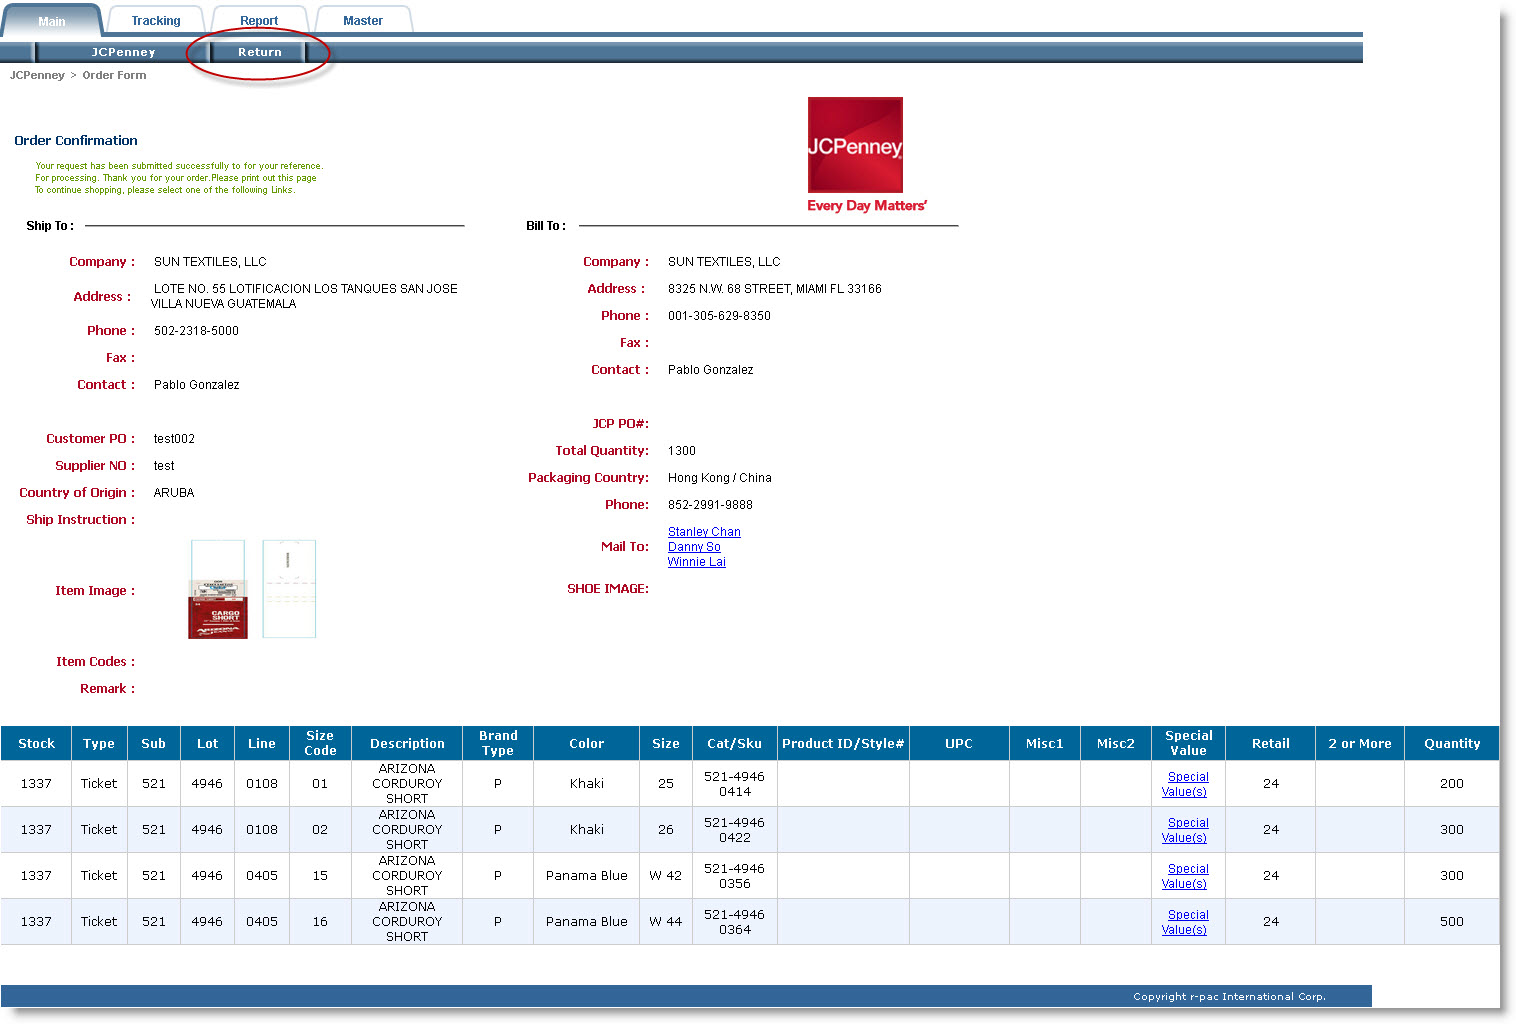
2) User can input/modify/verify the order information, if everything is ok, user can click ‘Confirm’ button to confirm this order and system will send an email to notify user that the order has been confirmed.
If user needs to revise the company name, user could select the 'Other' option to input the new company name.
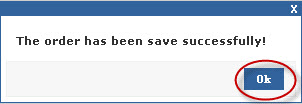
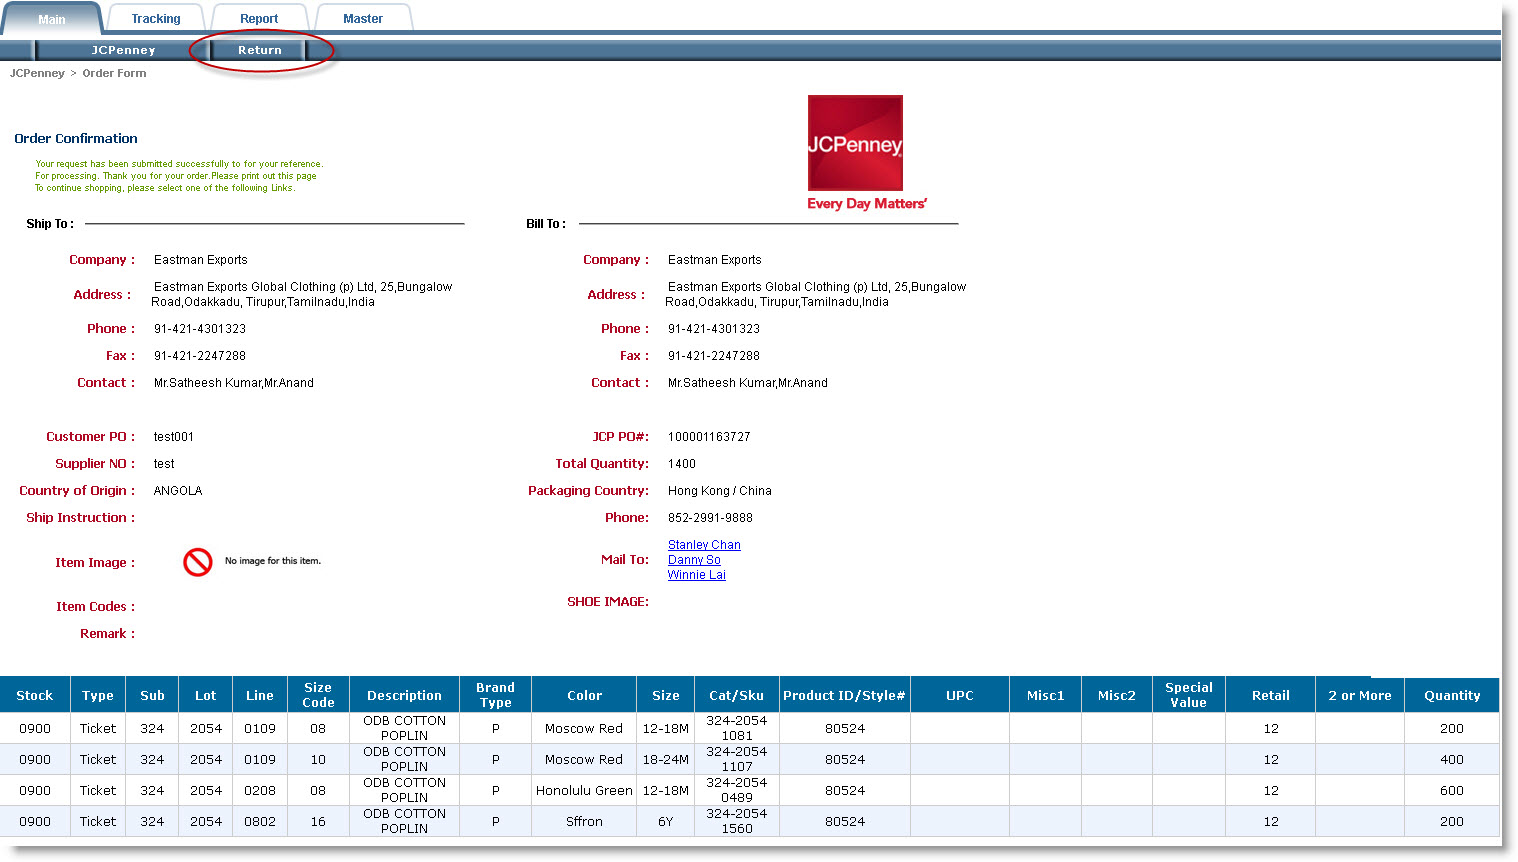
System will pop up a window to warning you that place order successfully. Click the 'Ok' button to show the order detail information.
Button Instruction:
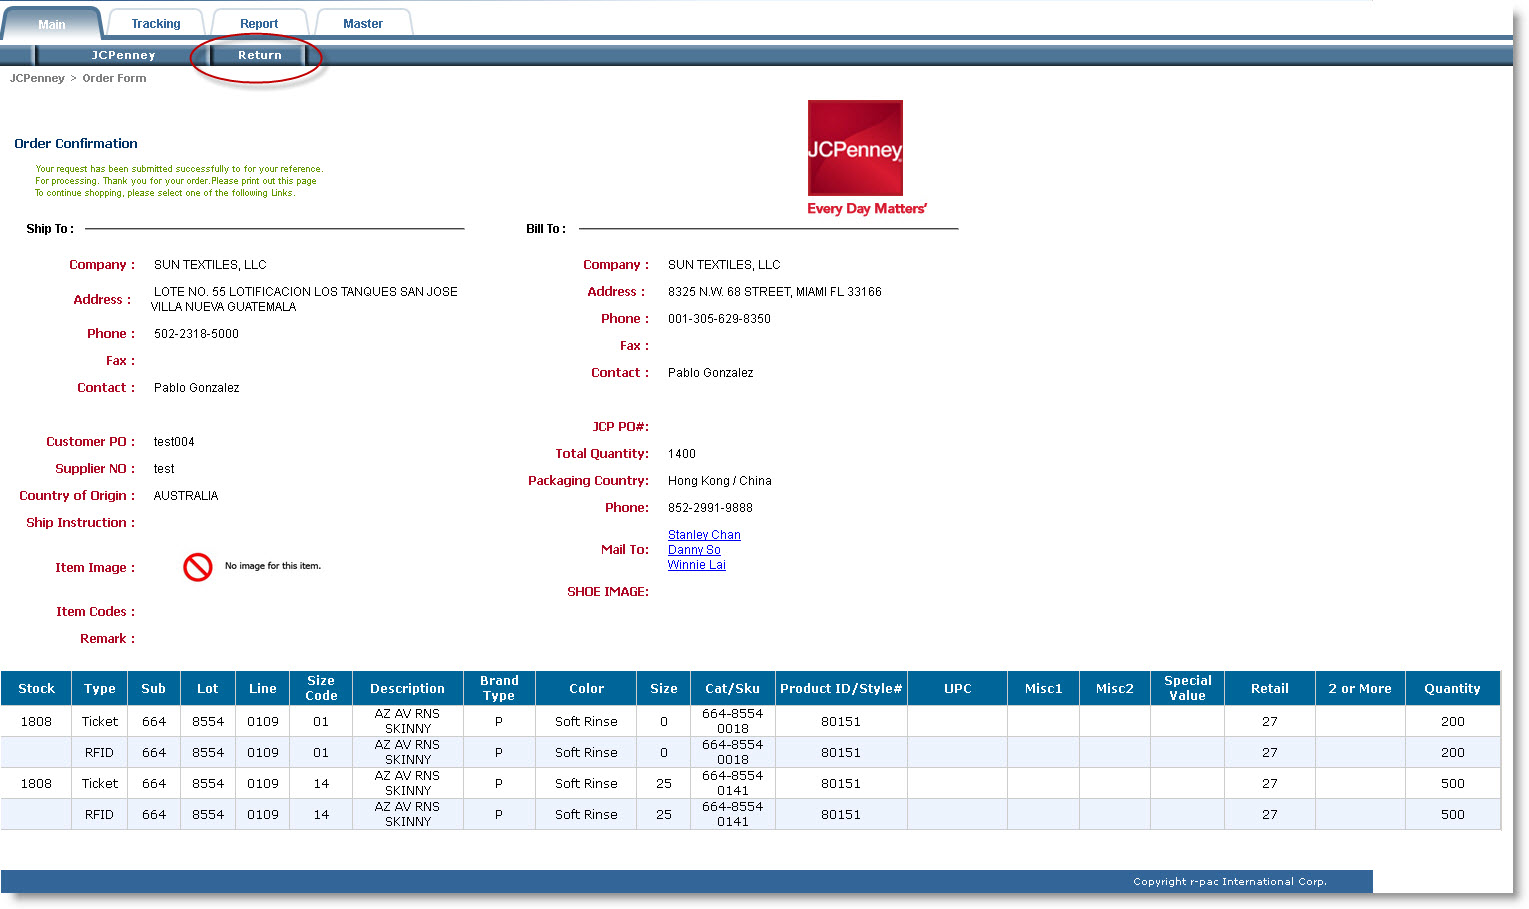
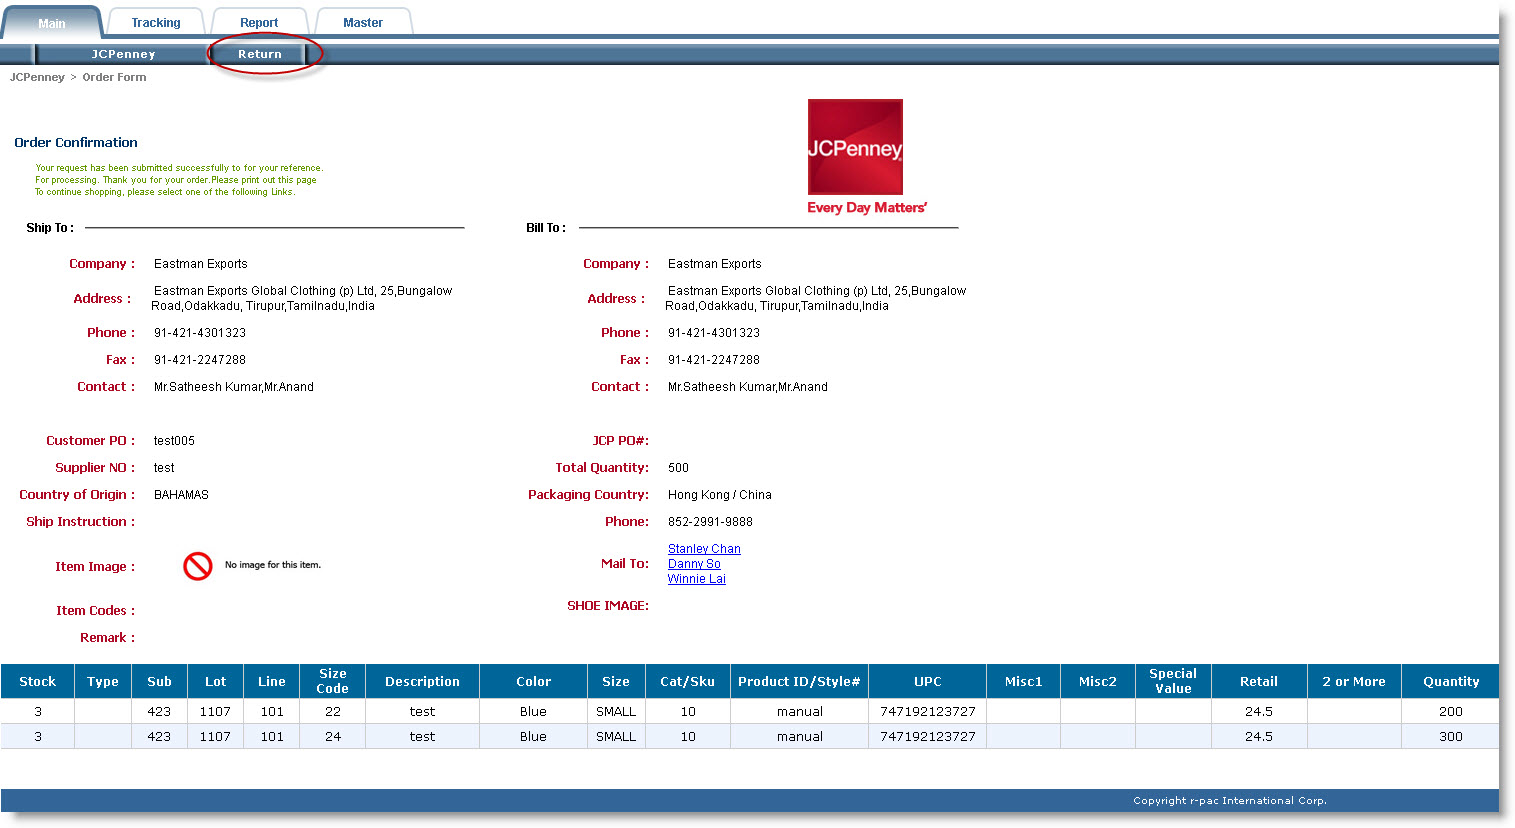
Return: Return to the ‘Main’ screen to place a new order.
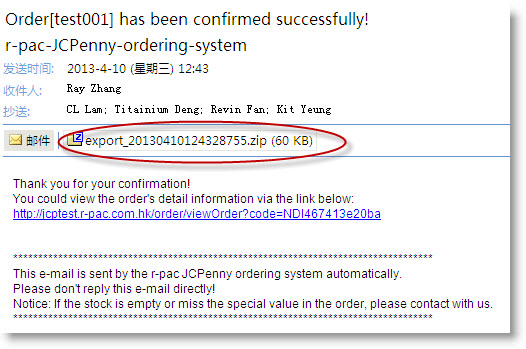
Order confirmed Email:
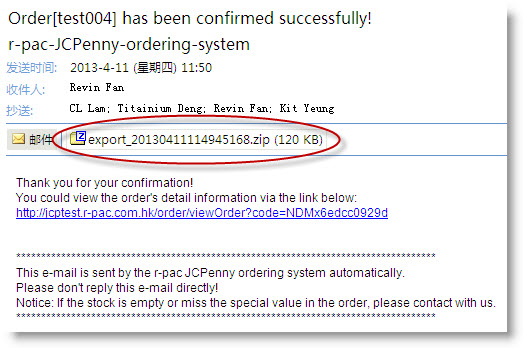
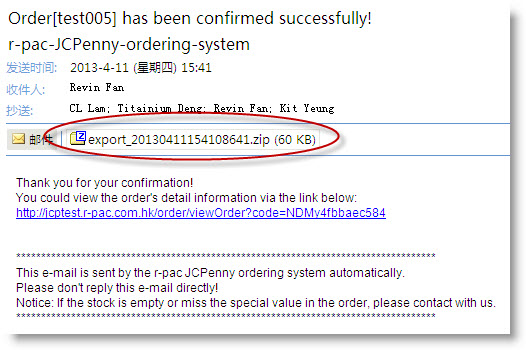
The attached file is the order production file which system generate automatically.
2.2 Order By Sub/Lot
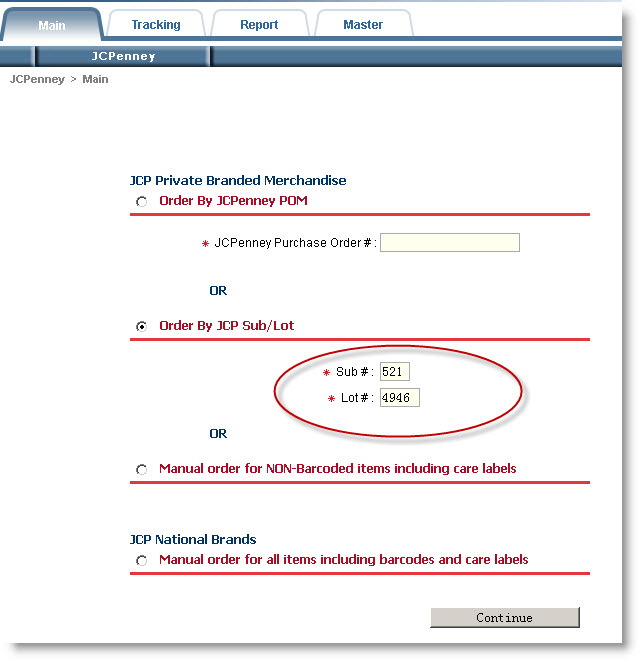
Select mode of place order ‘Order By JCP Sub/Lot’,input 'Sub#' and 'Lot#' information, then click on the ‘Continue’ button to show the screen pull from JCP without quantities included (Vendor will enter) when PO exist, and if there are more than one PO was found, user can select the PO from the search result list.
The item must input value with red asterisk(*).
2.2.1 Hang Tag
User can enter/modify/verify the order information, if everything is ok, user can click ‘Confirm’ button to confirm this order and system will send an email to notify user that the order has been confirmed.
If user needs to revise the company name, user could select the 'Other' option to input the new company name.
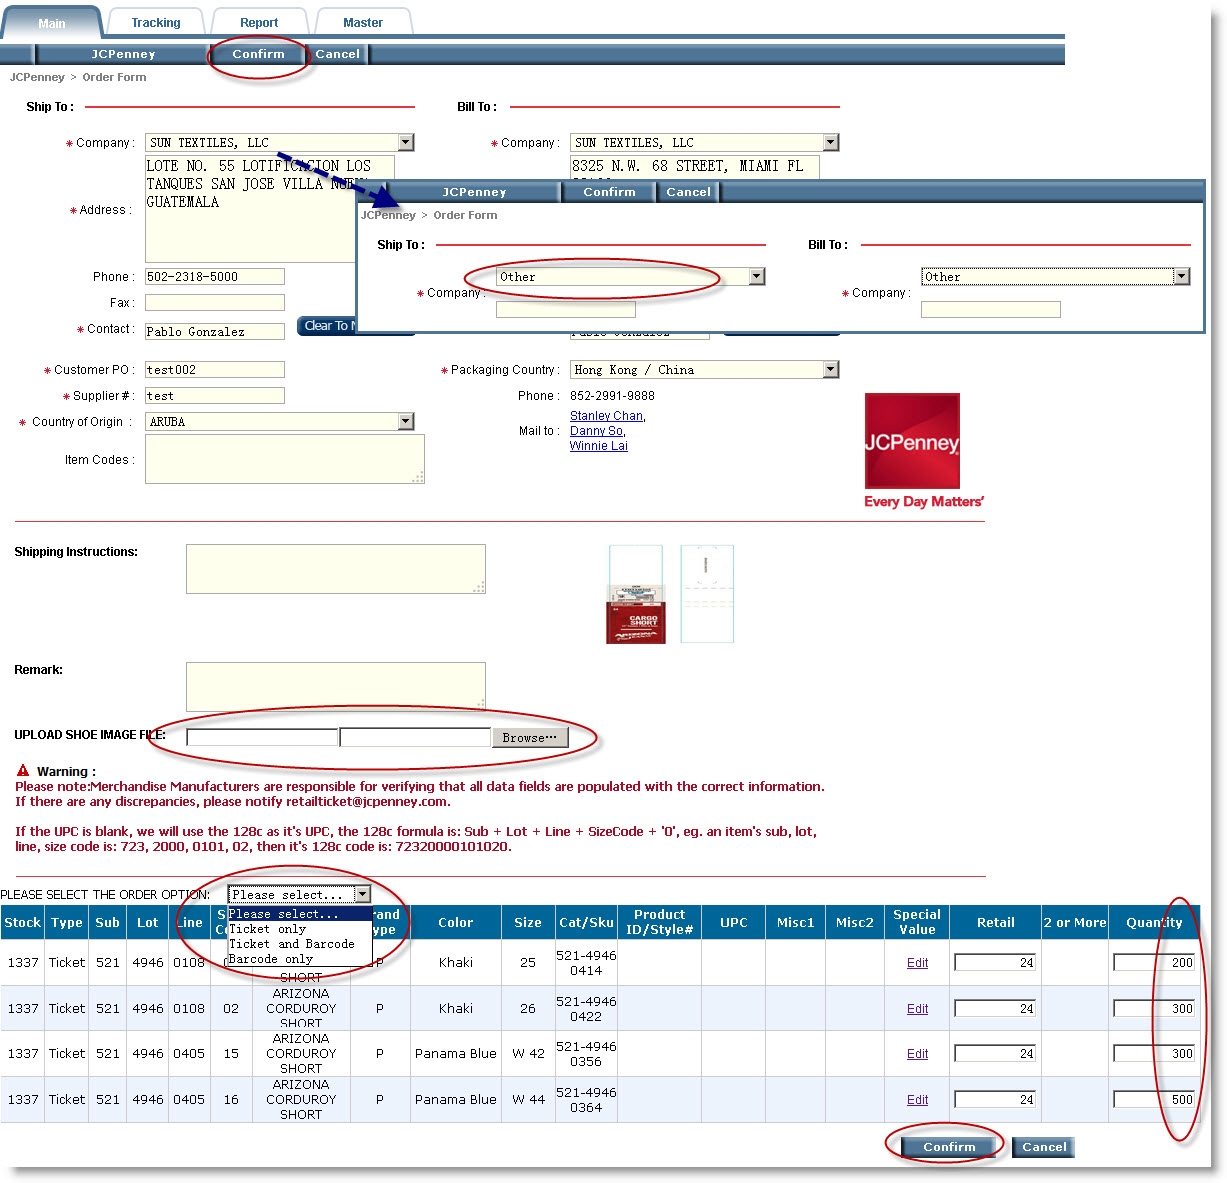
If the item lines have the special value column, then user should to fill out it for ordering. Click the Special Value hyperlink to set up the special value (Other ordering types also have below function).

System will pop up a window to warning you that place order successfully. Click the 'Ok' button to show the order detail information.
2.2.2 Care Label
If the order item is Care Label, then the system will show the fiber content and washing instruction column as below.
User can enter/modify/verify the order information, if everything is ok, user can click ‘Confirm’ button to confirm this order and system will send an email to notify user that the order has been confirmed.
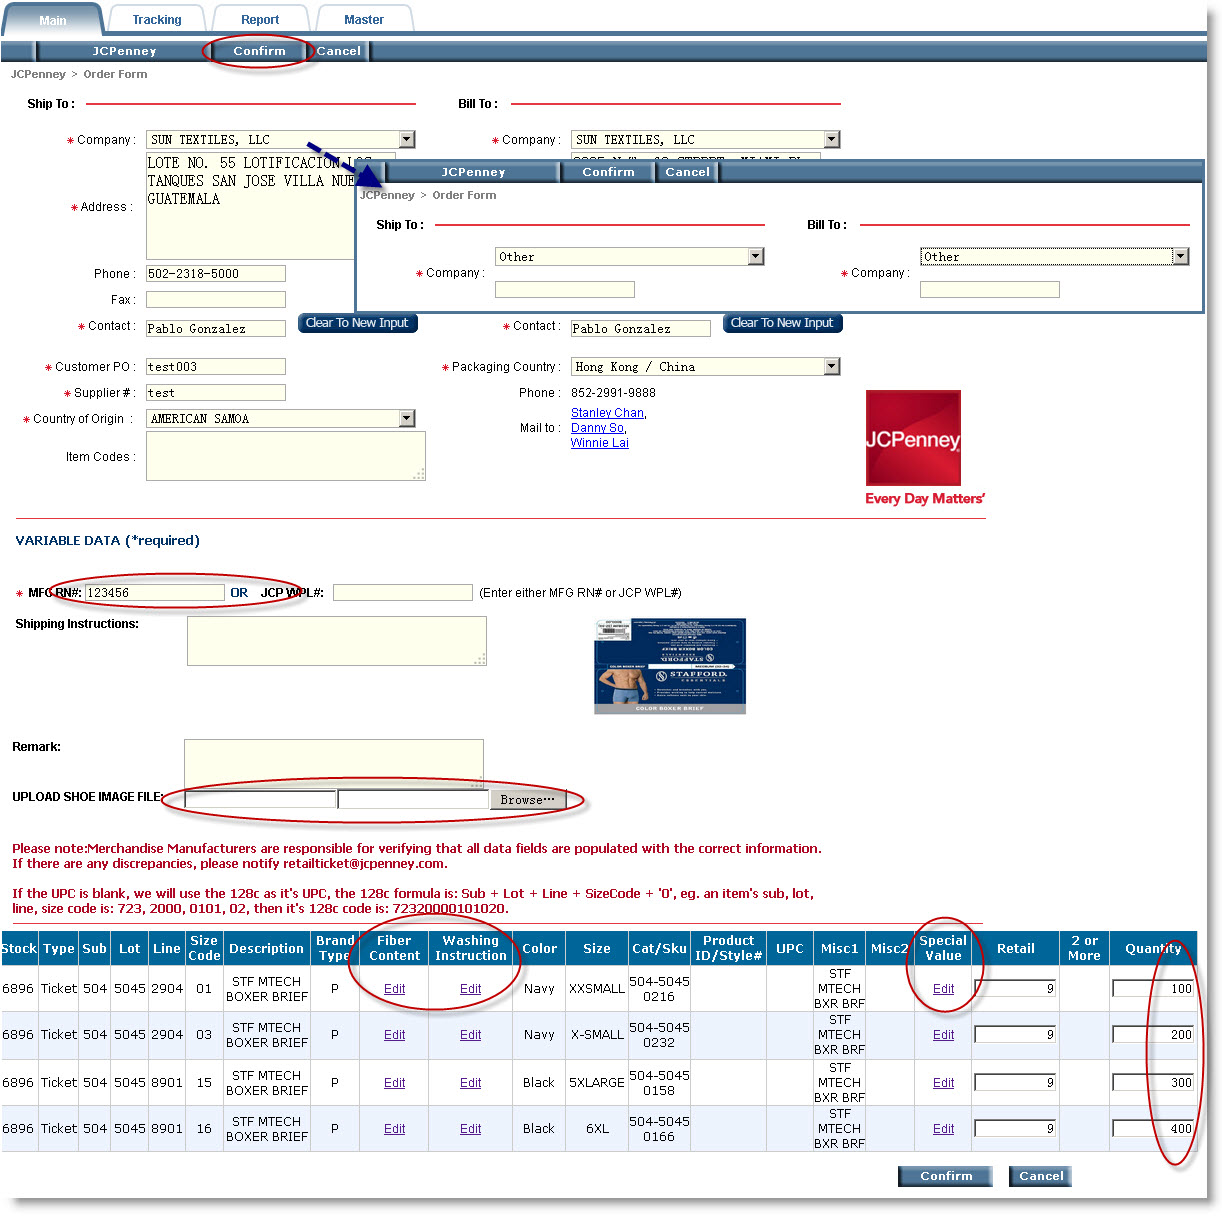
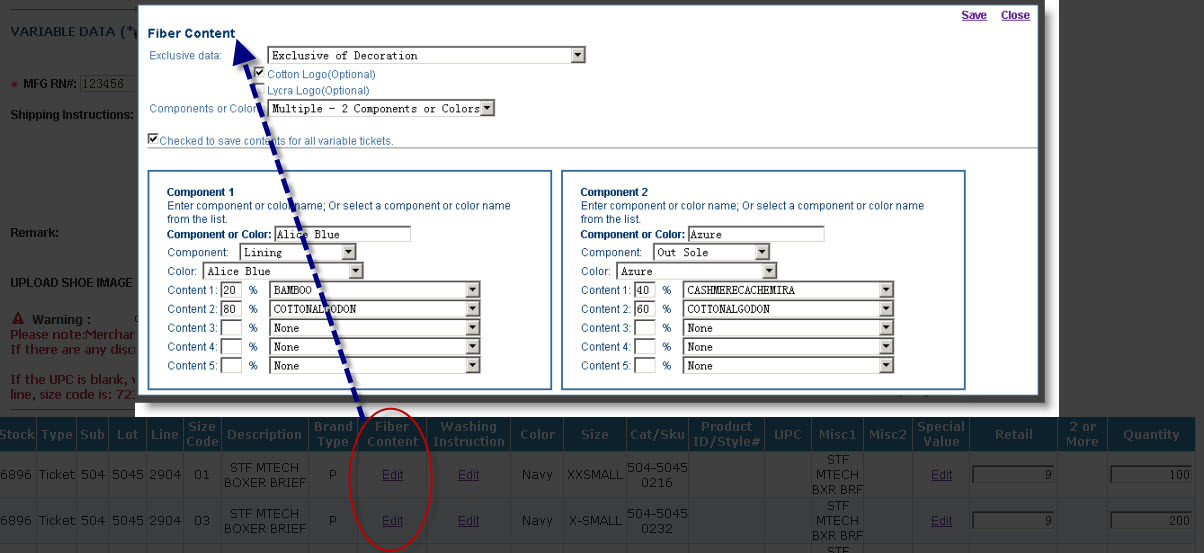
Click on the Fiber content column 'Edit' button to show the fiber content detail options.
If you tick the 'Checked to save contents for all variable tickets.' option, all item lines will use the same fiber content.
Click the 'Save' button to submit fiber content selections.
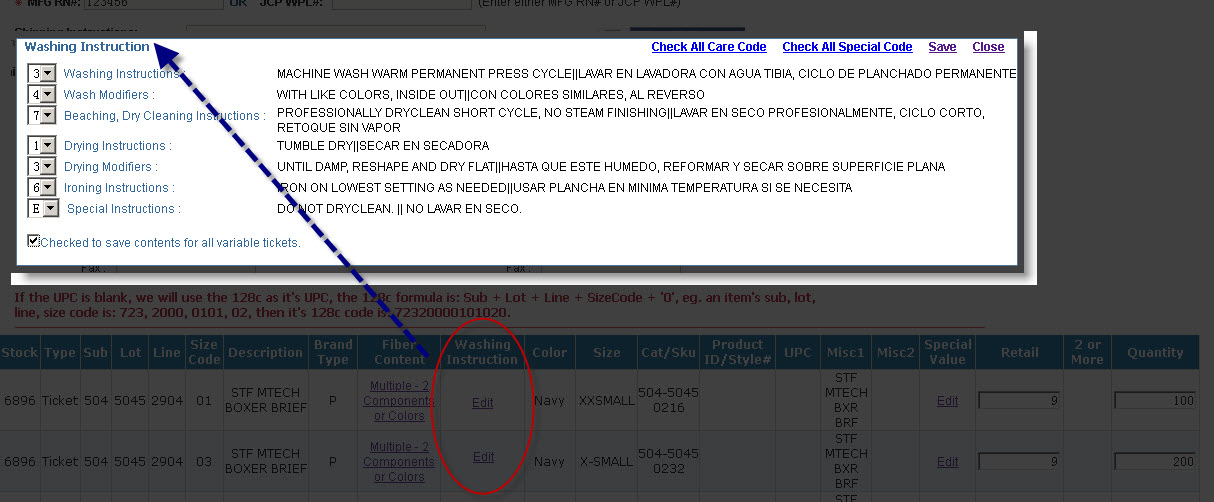
Click on the Washing instruction column 'Edit' button to show the washing instruction detail options.
if you tick the 'Checked to save contents for all variable tickets.' option, all item lines will use the same washing instruction.
Click the 'Save' button to submit washing instruction selections.
Click the 'Check All Care Code' link button to view all of care code.
Click the 'Check All Special Code' link button to view all of special code.
More details about Care Code you can refer to: Care code Special Instruction- 09-09.xls
More details about Label System you can refer to: JCP_PrivateBrand_SewnInLabelGuide.pdf
System will pop up a window to warning you that place order successfully. Click the 'Ok' button to show the order detail information.
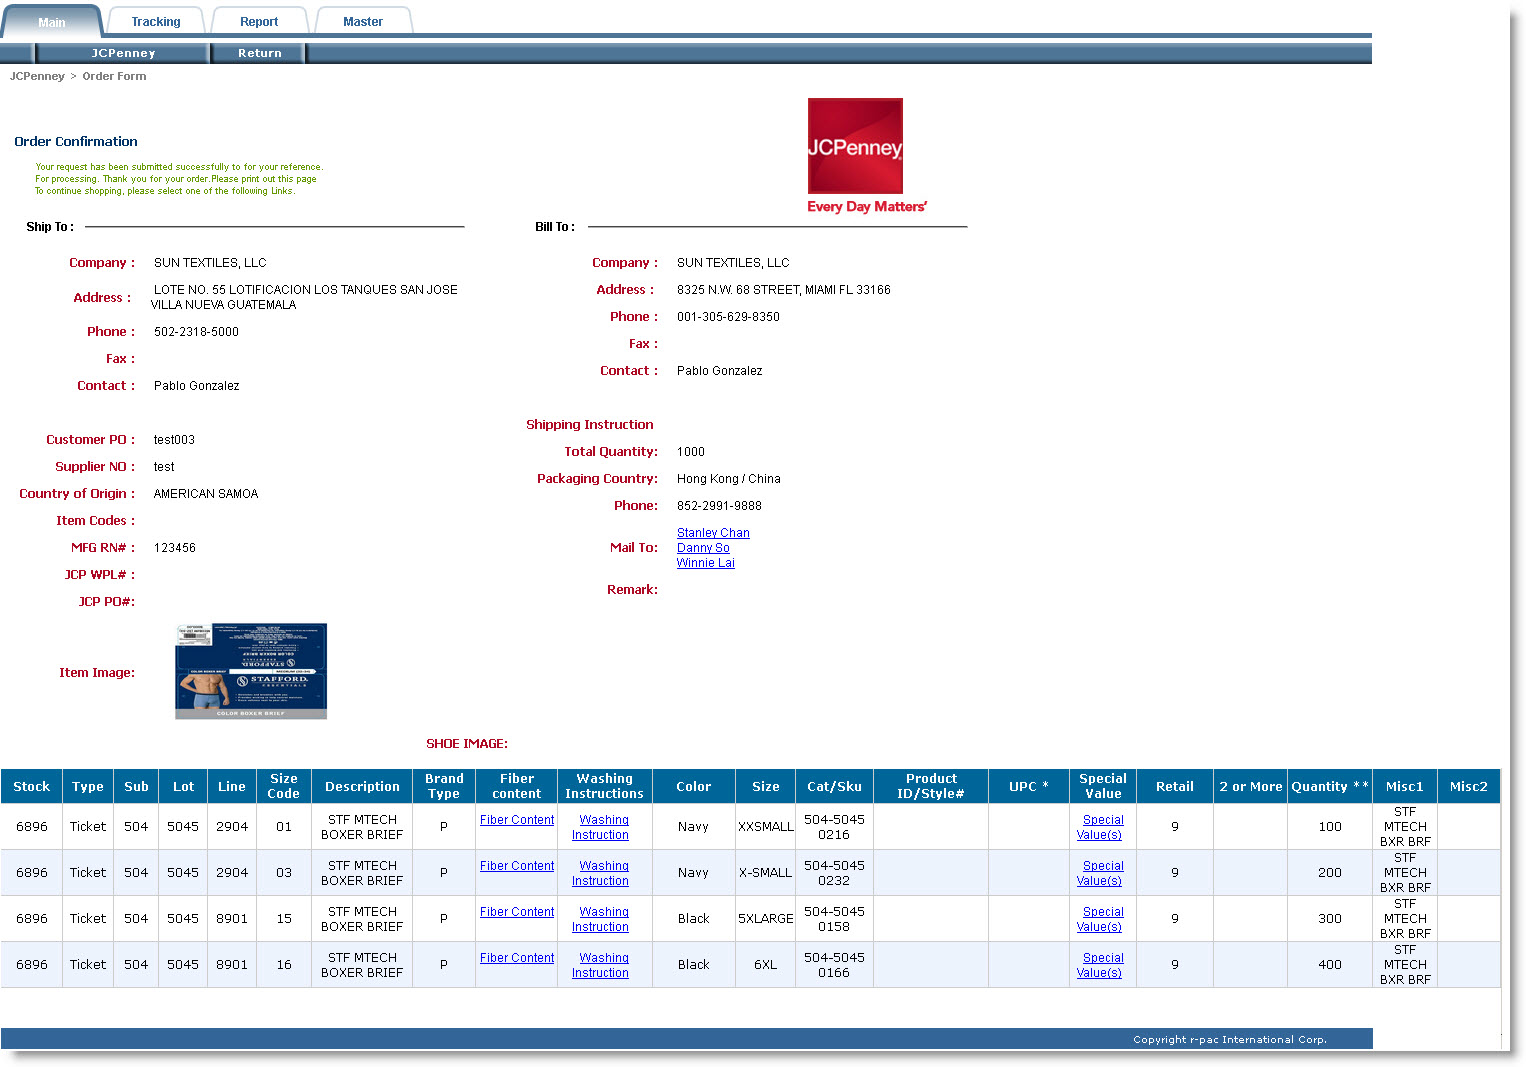
2.2.3 RFID Order
If the item is RFID type, the system will query the RFID information from JCP according to the sub/lot keyed in by the user, if it does, there will be a selection widget being show at the place order web page for user to choose.
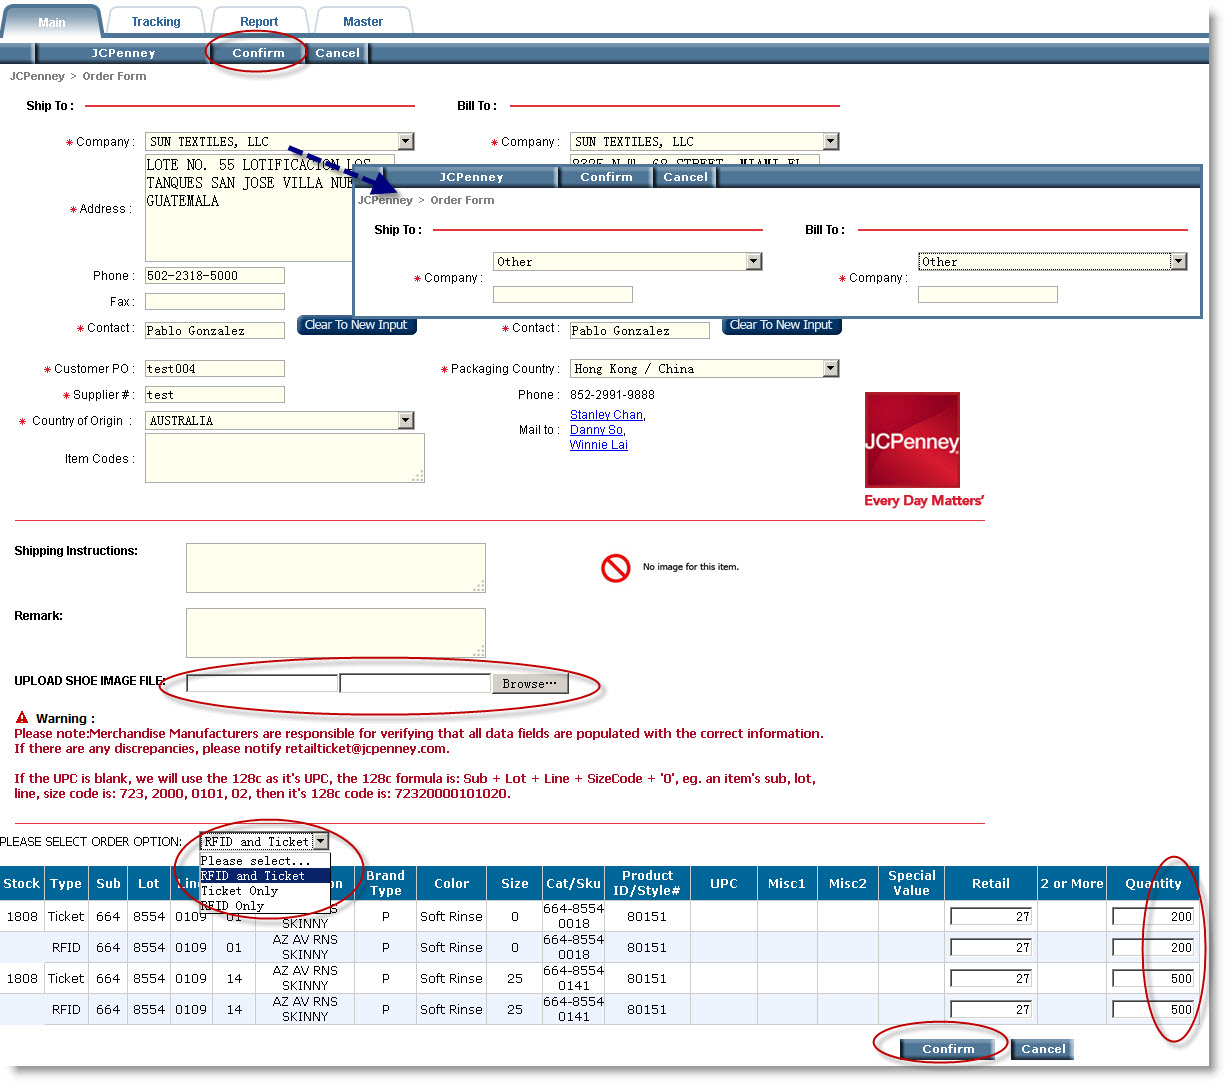
After input and double check the order information, then click the ‘Confirm’ button. The system will store it and send an e-mail to the user to inform the user the order has been effective. And our system will pop up a window to tell the user the order has been successfully booked. The user can click the ‘OK’ button, and the system will show the detail information about the order.
Order confirmed Email:
2.3 Order By Manual
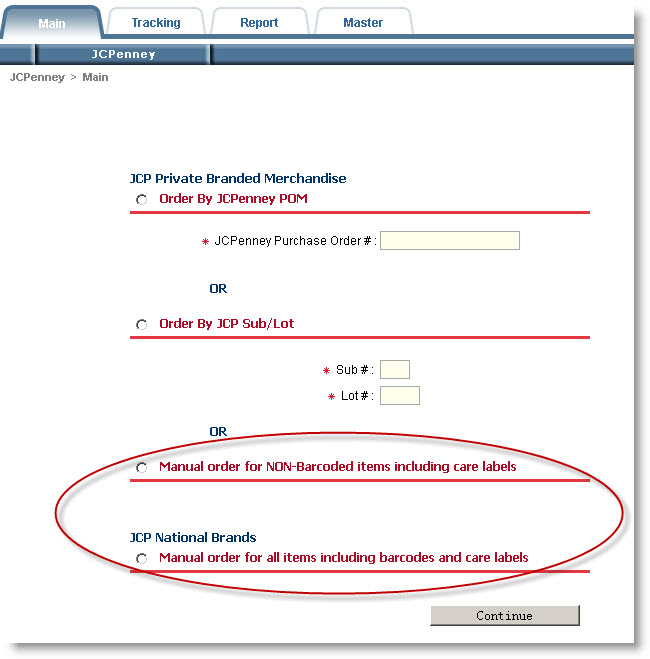
1) Select the manual place order mode as below picture showing, then click on the ‘Continue’ button to show the order confirmation screen which need user to input all the order information manually.
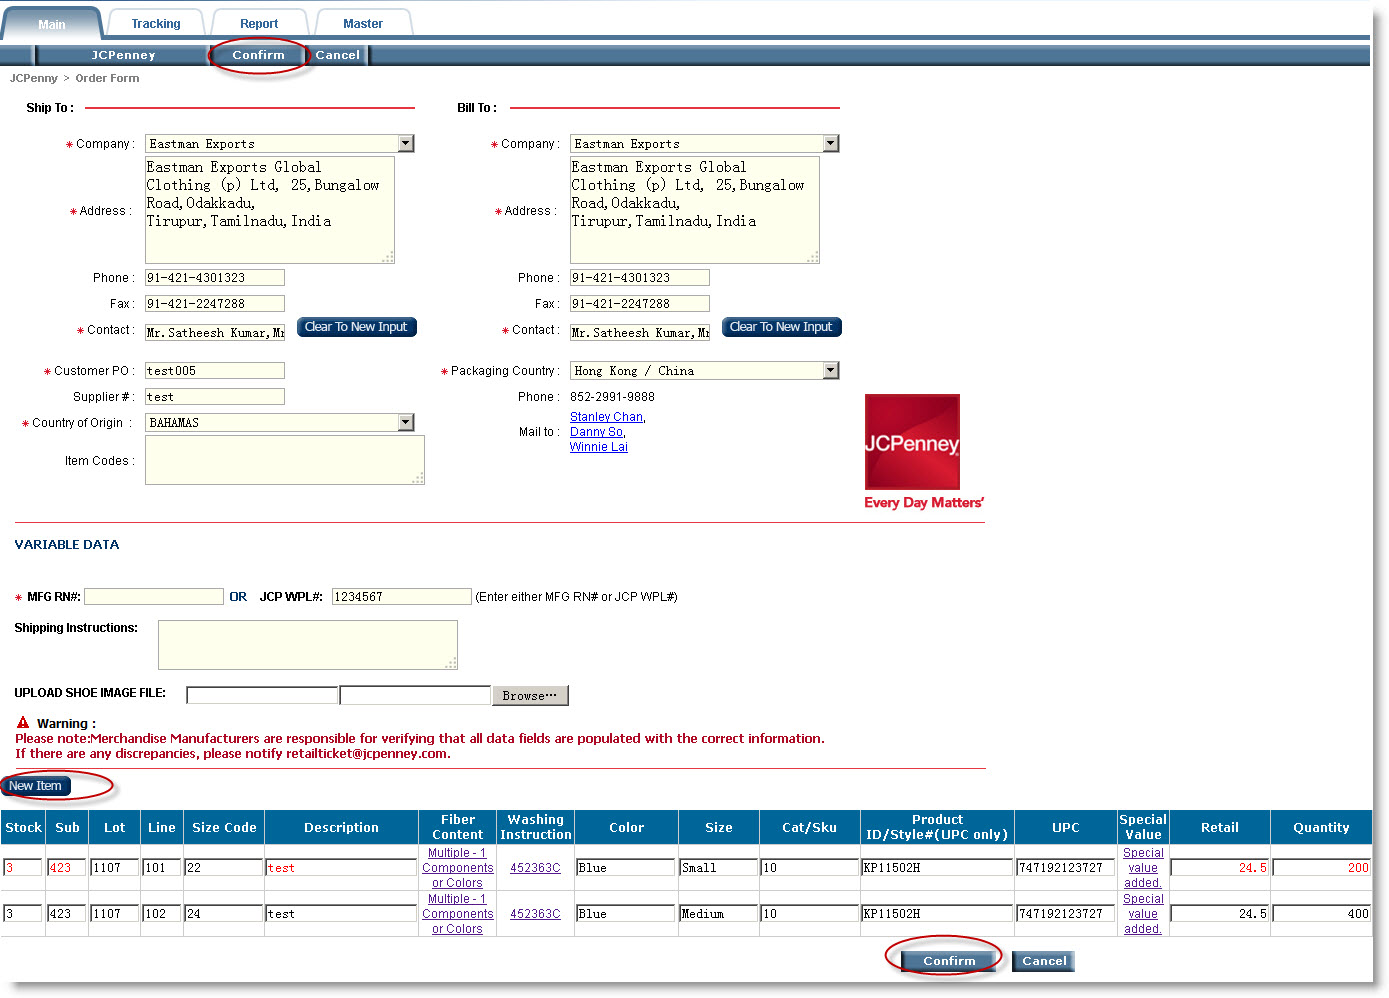
2) User enter all the order information, the button ‘New Item’ use to add a new item line for this order, if everything is ok, user can click ‘Confirm’ button to confirm this order and system will send an email to notify user that the order has been confirmed .
If the order item is Care Label, users need to select the fiber content and washing instruction. You can refer to the chapter 2.2 about the operation.
System will pop up a window to warning you that place order successfully. Click the 'Ok' button to show the order detail information.
Order confirmed Email:
3. Order Tracking
Order tracking flow:
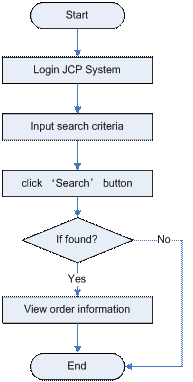
1) input search criteria:
A. By POM#:

B. By Customer PO#:

C. By PO Date:

2) Click on the ‘Search’ button to show the search result, if user has input multiple criteria, then the system will treat as ‘AND’ condition.
Click the Custom POM# with hyperlink will show the order detail information.

4. Order Revise
The order must have been unlocked by r-pac Account Executive before users revise the order.
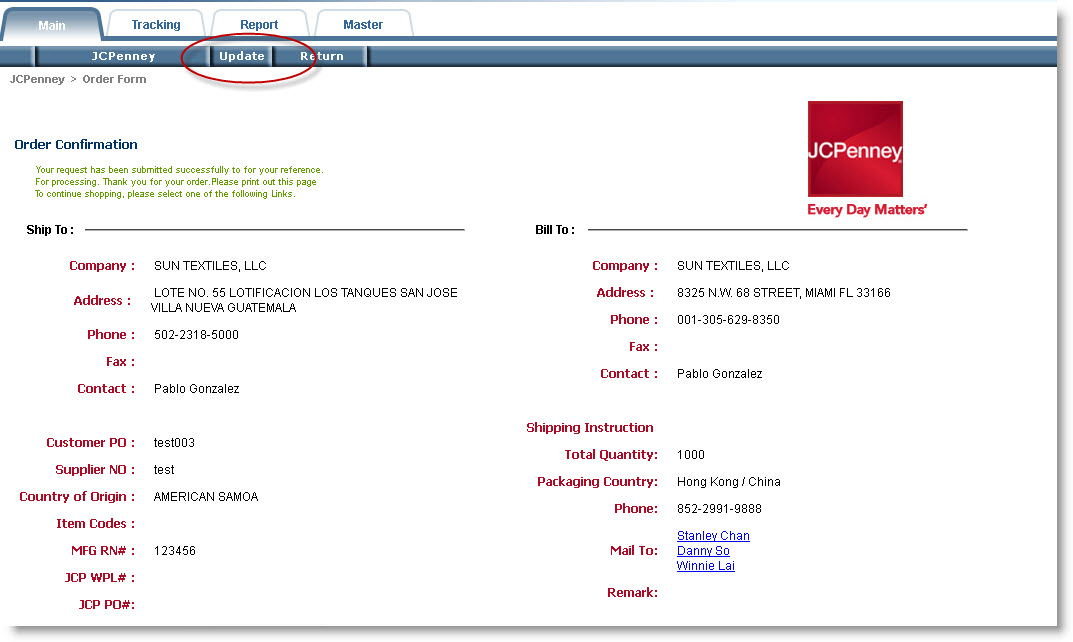
1) Search out the unlocked orders which will have a red mark in the front of the order, then click on the ‘Custom POM#’ to show the order detail information.

2) System will change the order into edit status after clicking on the ‘Update’ button, then user can revise order information, when all information have revised, then click on the ‘Confirm’ button to submit the modification.
5. Reports
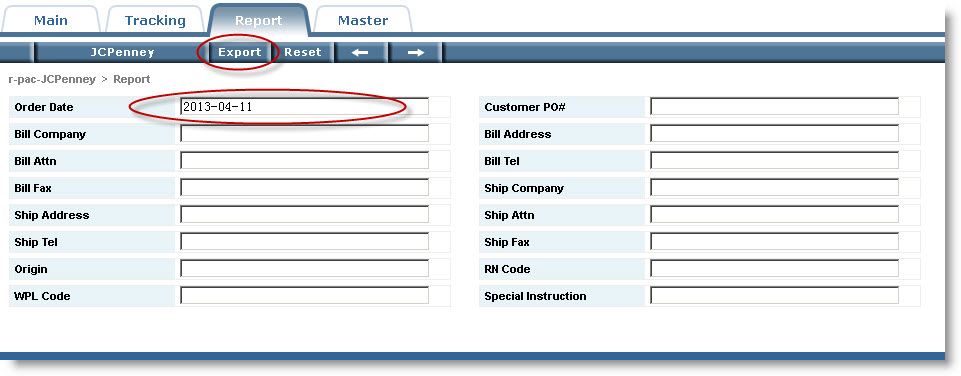
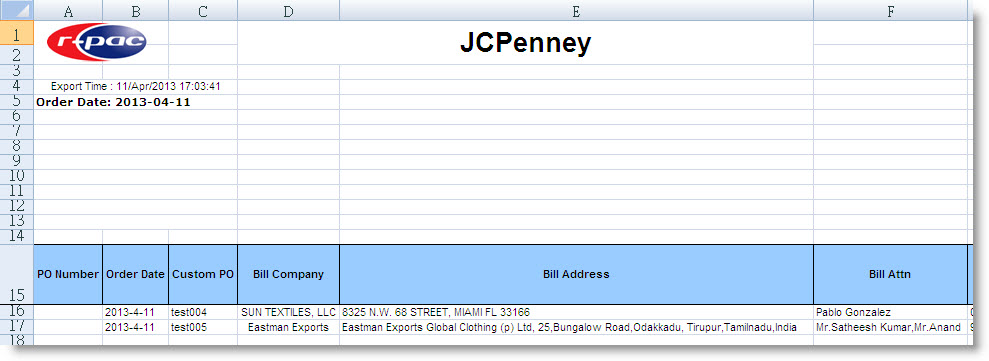
Input criteria for report and click the ‘Export’ button to export the report file, if user has input multiple criteria, then the system will treat as ‘AND’ condition.
6. View Item Detail
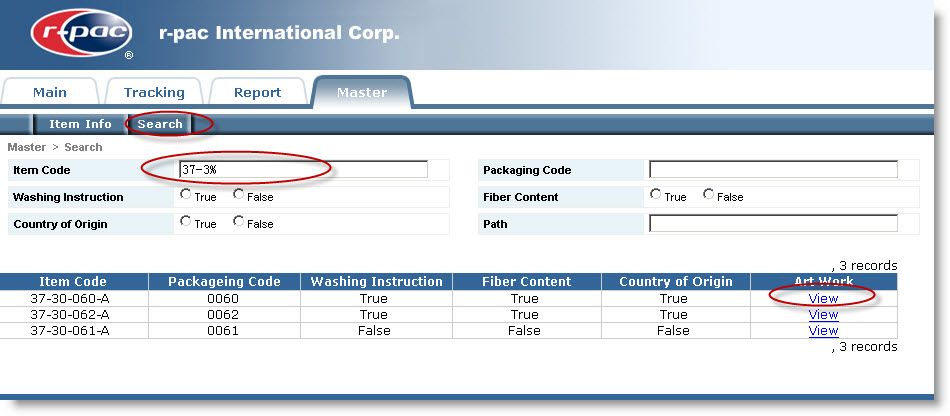
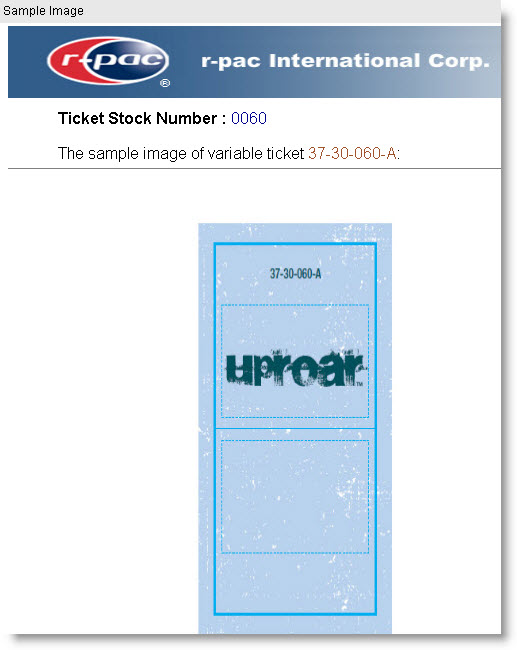
First, select the ‘Item’ page, then input the search criteria and click on the ‘Search’ button to show the item list, at last, click on the ‘View’ button at the end of the item to pop up a window which will show the item sample image.
7. Create New Account
1) Click on ‘Create an account’ at login screen to go forward to the user create page.
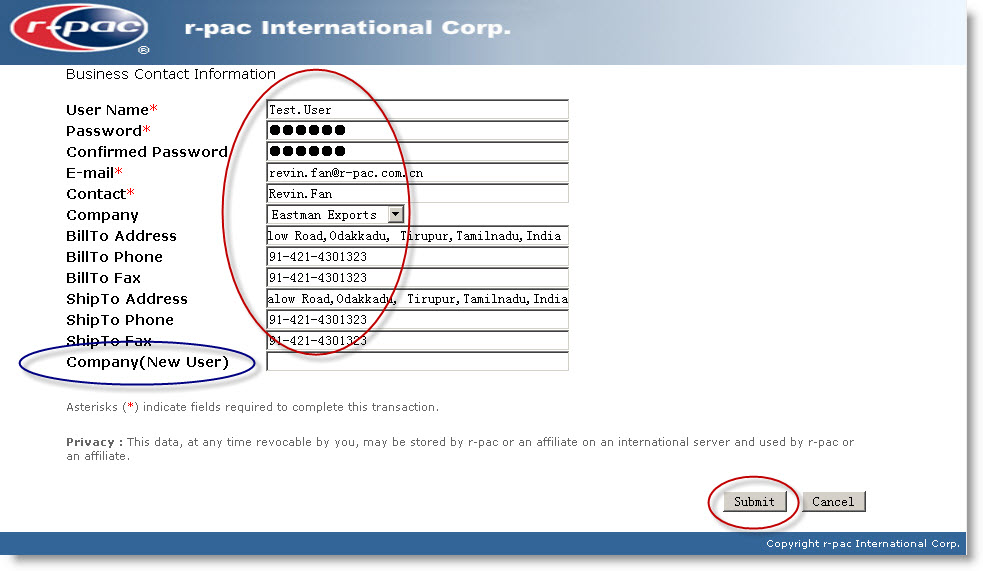
2) Fill out the fields with correct information and click the ‘Submit’ button to submit the registration information.
Tips:
A. The fields with red asterisk (*) required user must fill in.
B. User should check the e-mail address fill in e-mail field, cause the system will send order confirmation information to this mail box.
C. There are three kinds of permission are Admin, JCP and Buyer in our JCP web system, the default permission is JCP that user creating new account by this way, if you want other permissions you can email to r-pac system administrator for changing.
Admin: user can place order and view all orders.
JCP: user can place order and only view the orders placed by them.
Buyer: user only can view all orders.
D. If it is a new customer, user could input the new company name in the blue highline column Company (New User) and the corresponding Bill To and Ship To address.
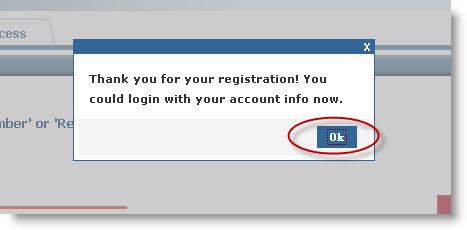
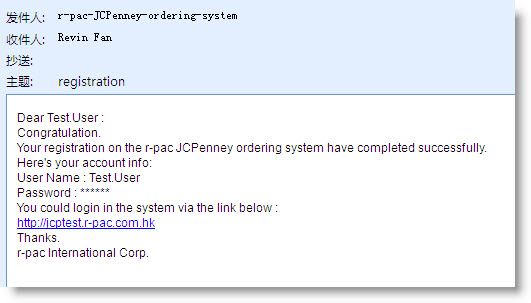
3) System will show the success information to you and send you congratulation e-mail, then you could login the JCPenney EDI system.
If you never received the congratulation email then you’d better to contact the r-pac administrator.
|